Android Studio
Getting Started
You can download latest JDK from this url :https://www.oracle.com/java/technologies/downloads/#java8

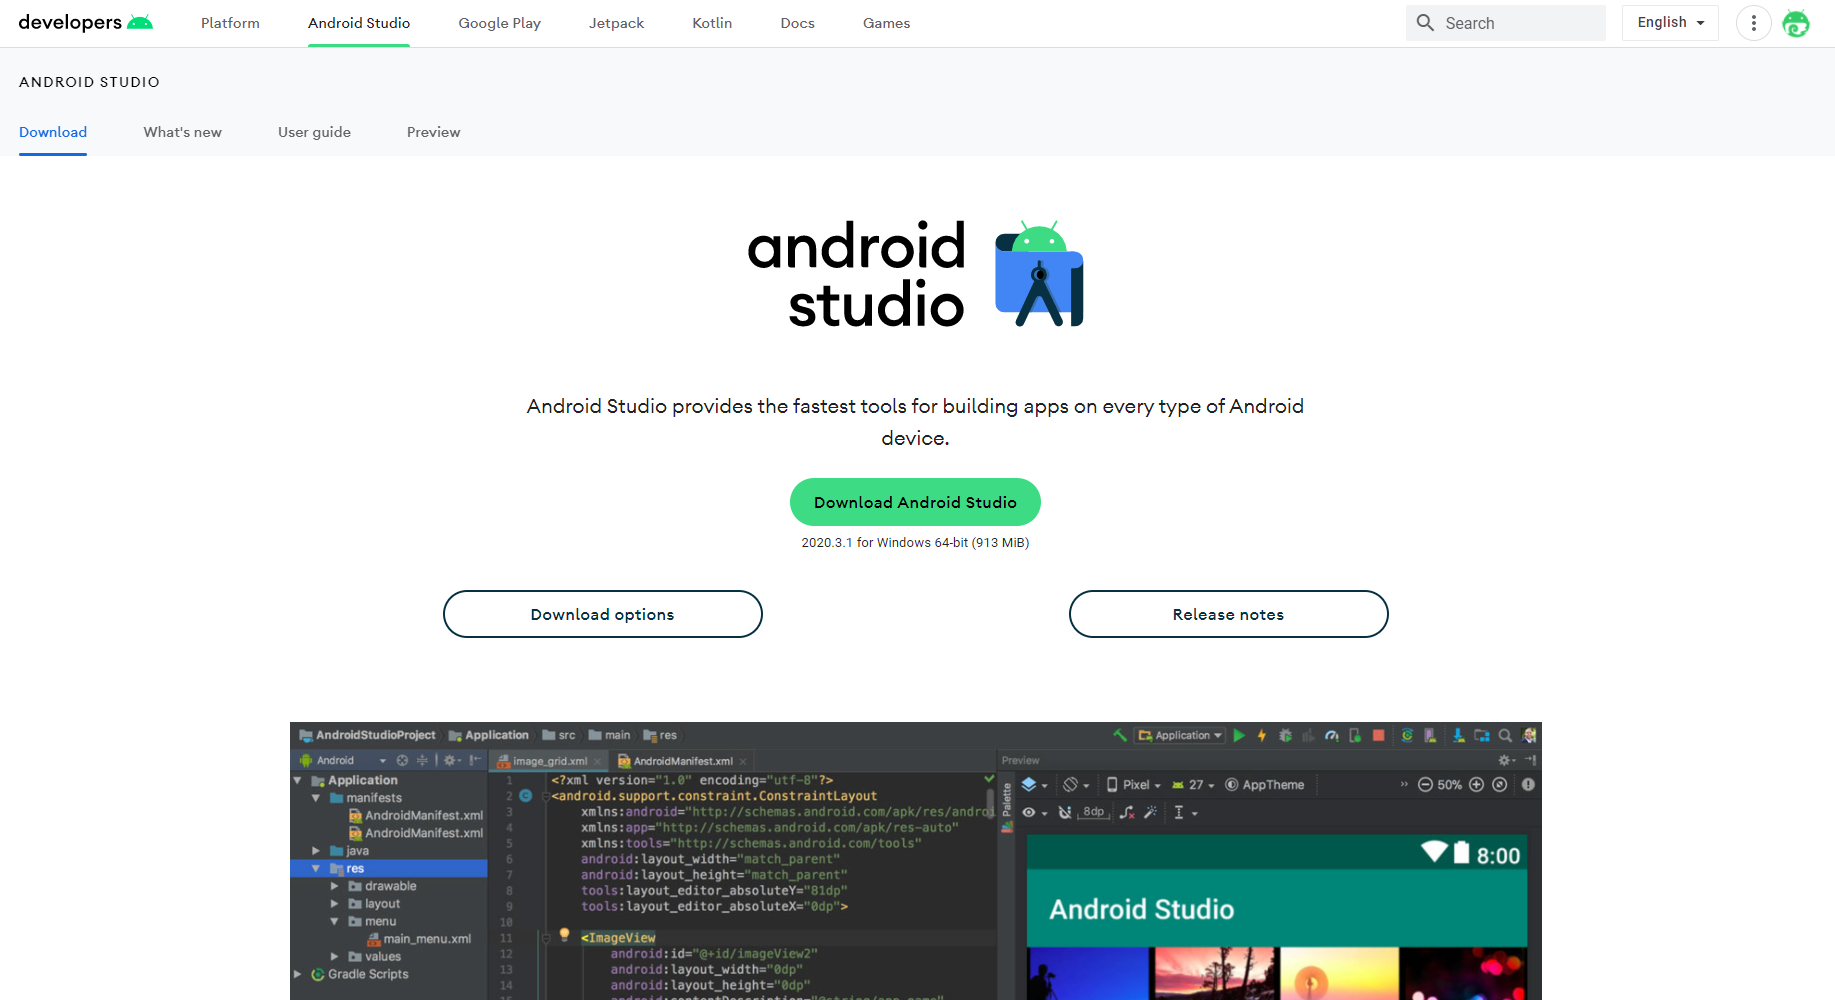
Download and Install Android Studio
You can download latest Android Studio from this
url :
https://developer.android.com/studio/
Import Project

2.Browse location Project and press “OK” button.
3.Wait for few minutes until all process import has finished.
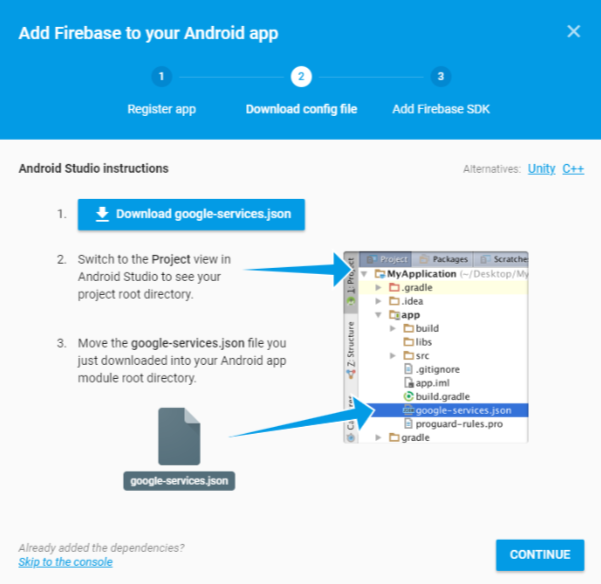
Generate google-services.json
Please note : this step is mandatory to generate google-services.json
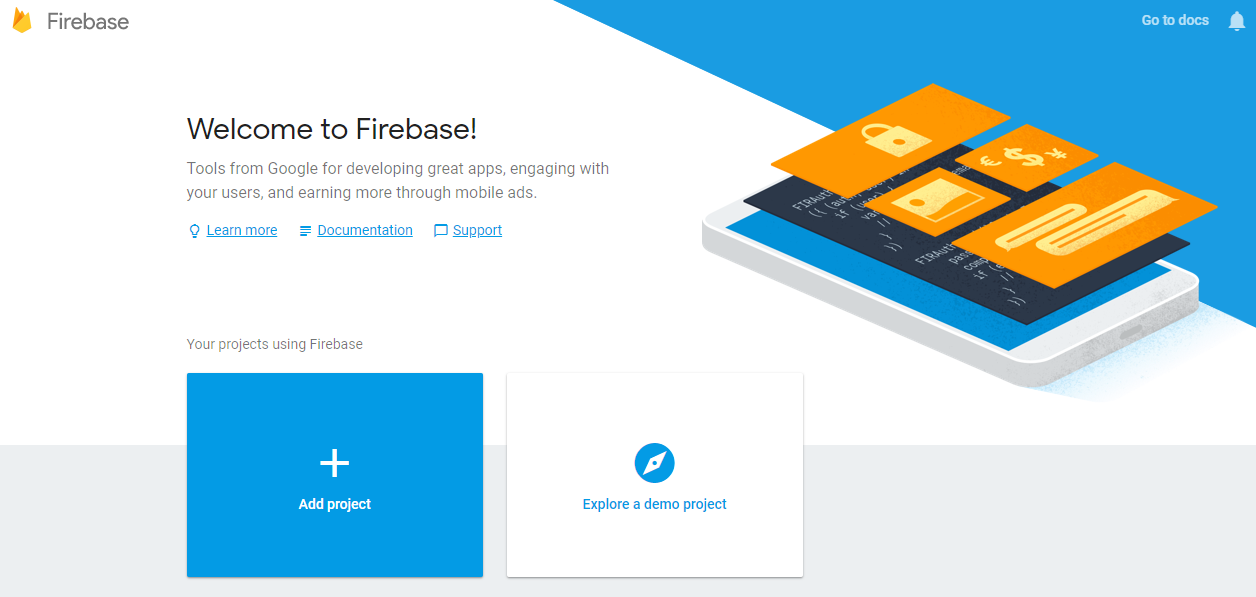
Please register or log in first and then select create new project. In the dialog window enter the name of the project that will be created and
the contents of the
state and then click the
create project to
continue.

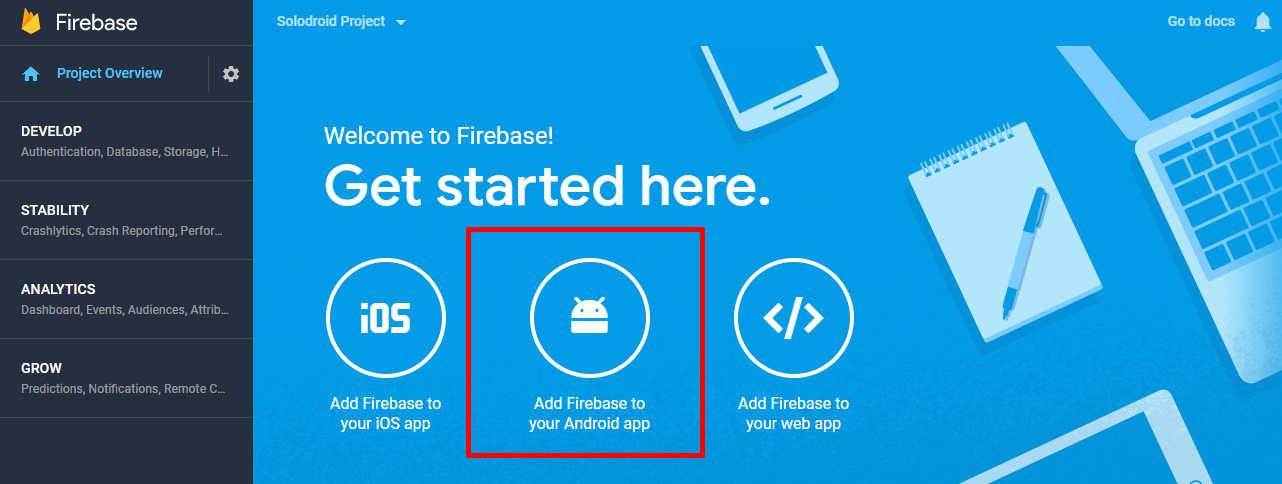
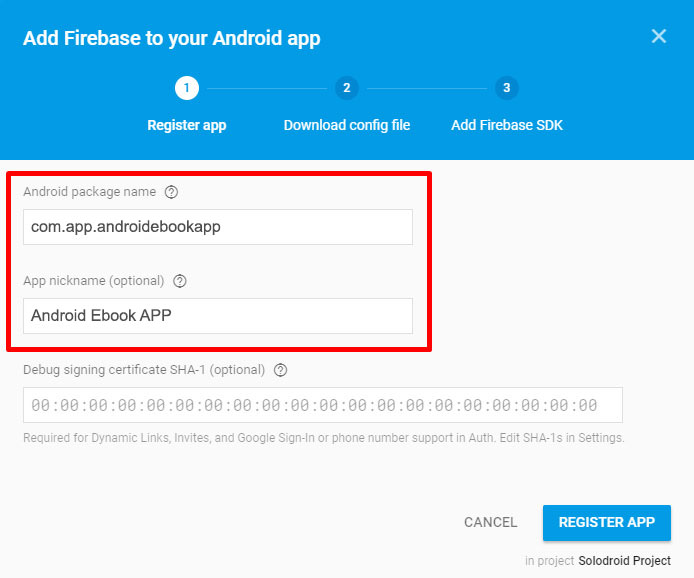
Then on the dashboard Firebase select Add Firebase to your Android app. In the next dialog window enter the name of the Android application package and SHA1 of fingerprints Certificate (optional).
Push Notification
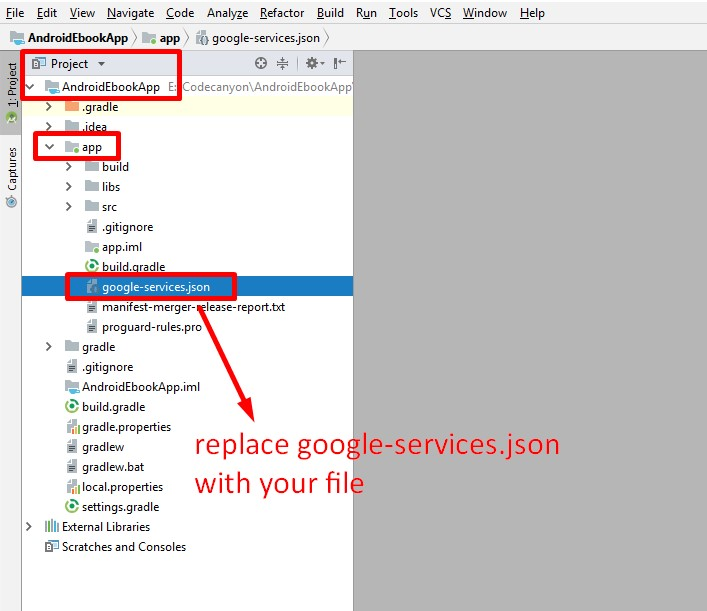
We provide 2 providers to send notification messages : FCM and OneSignal, FCM configuration is required and has been explained in the previous step by replacing google-services.json with yours, then OneSignal setup is optional.
FIREBASE CLOUD MESSAING (FCM)
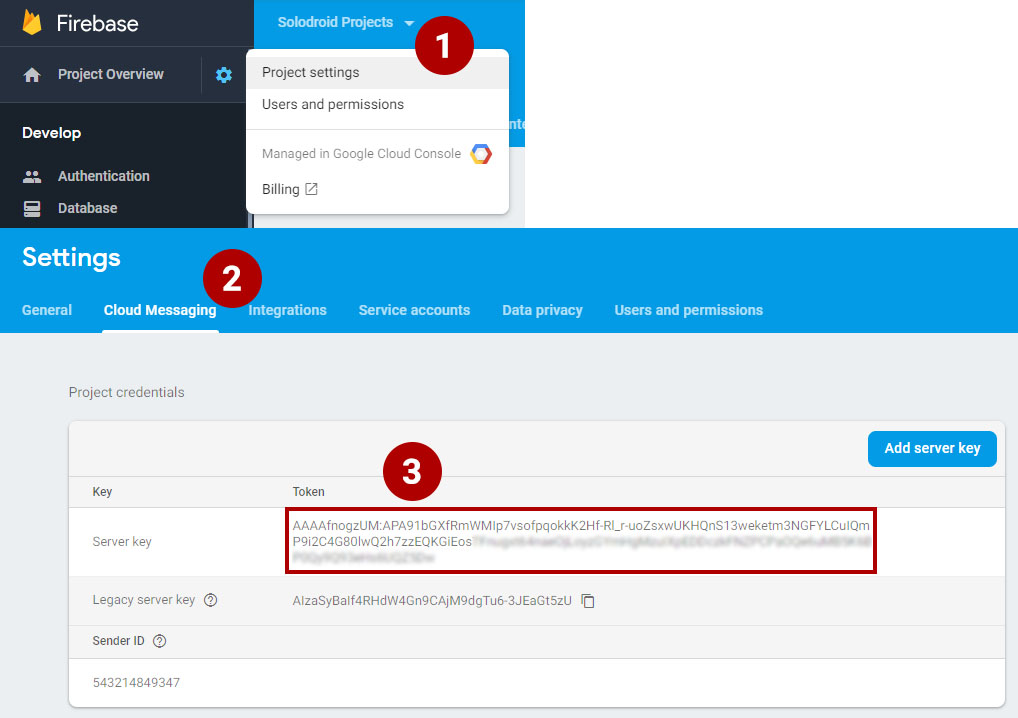
Server Key
Firebase provides Server API Key to identify your firebase app. To obtain your Server API Key, go to firebase console, select the project and go to settings, select Cloud Messaging tab and copy your Server key.
FCM Notification Topic
In the latest updated version starting from version 4.0 or higher, notifications are received based on subscribed topics, so, the FCM token will not be stored in the database and no longer used.
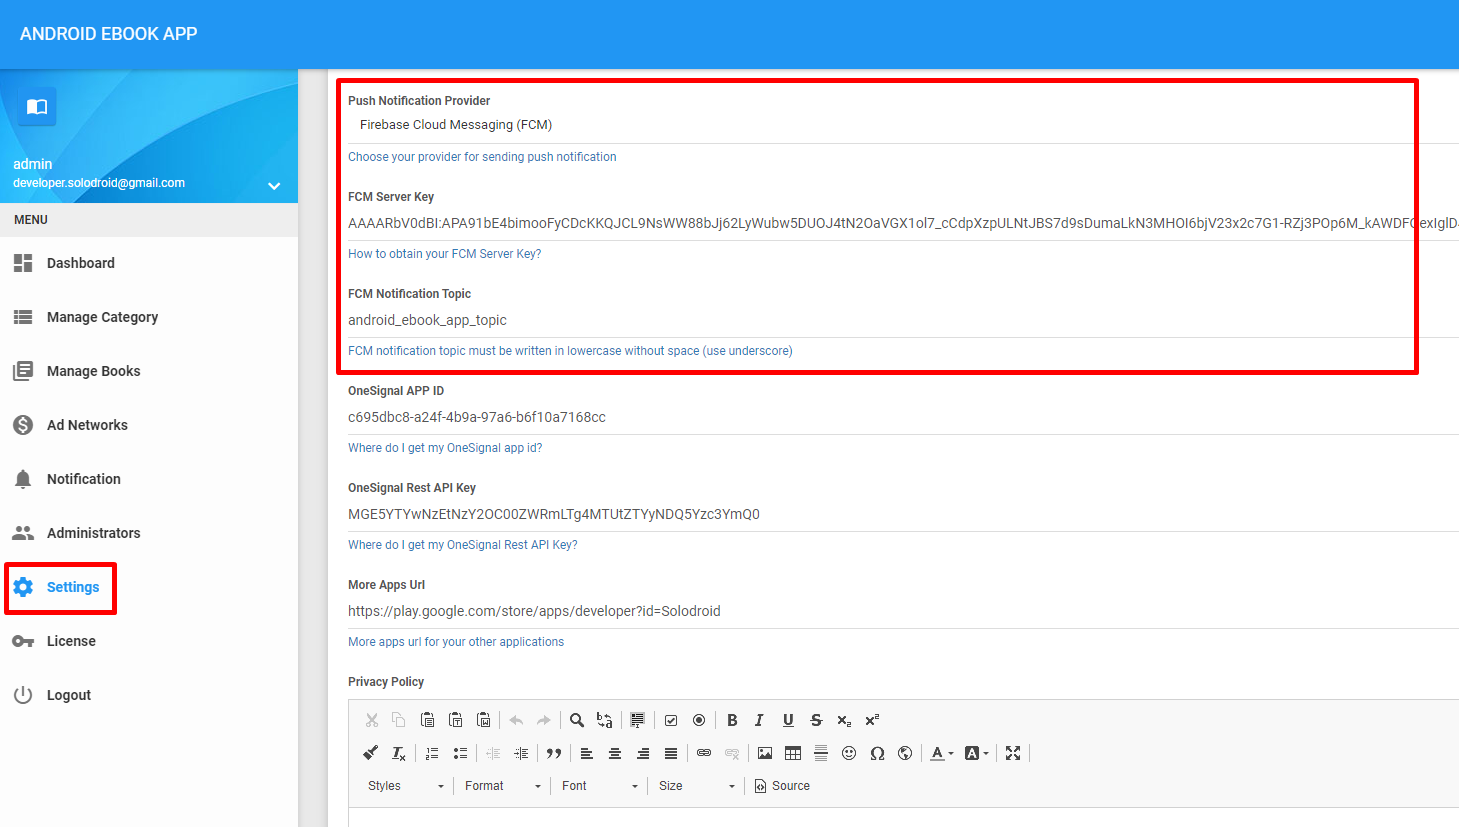
Notification topic name is determined by you, the notification topic must be written in lowercase without space (use underscore), e.g : android_ebook_app_topic
Login to your Admin Panel, navigate to Settings menu and put your FCM Server Key and FCM Notification Topic.
ONESIGNAL
Required For Setup
A OneSignal Account, if you do not already have one
Your OneSignal App ID, available in Keys & IDs
A Google/Firebase Server API Key
A device or emulator that has Google Play services installed and updated on it (Device will not subscribe or receive push notifications with out this).
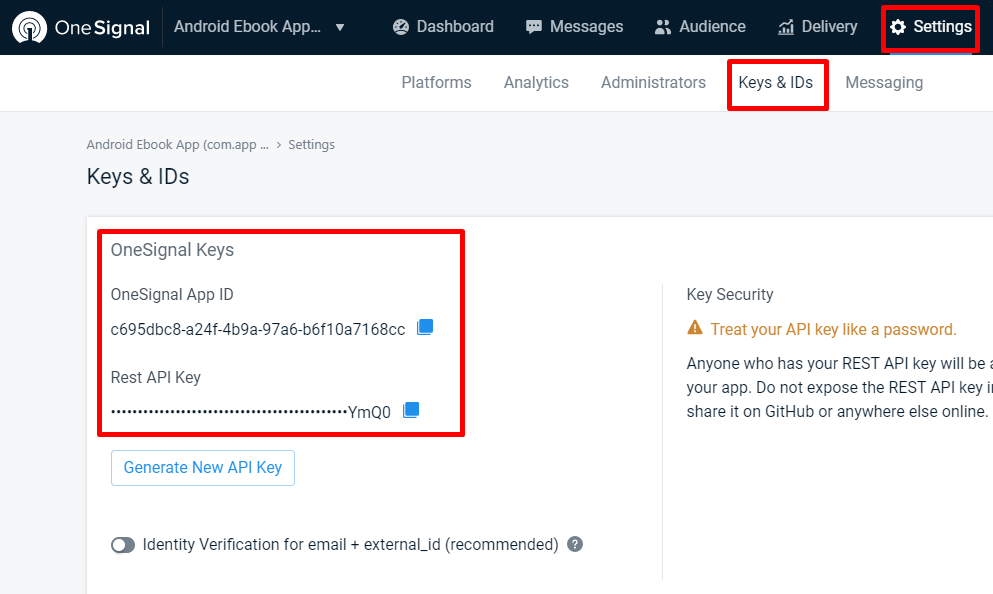
Keys & IDs Setup
Login to your OneSignal Account and select your app
Select SETTINGS > Keys & IDs to get your OneSignal APP ID and REST API KEY
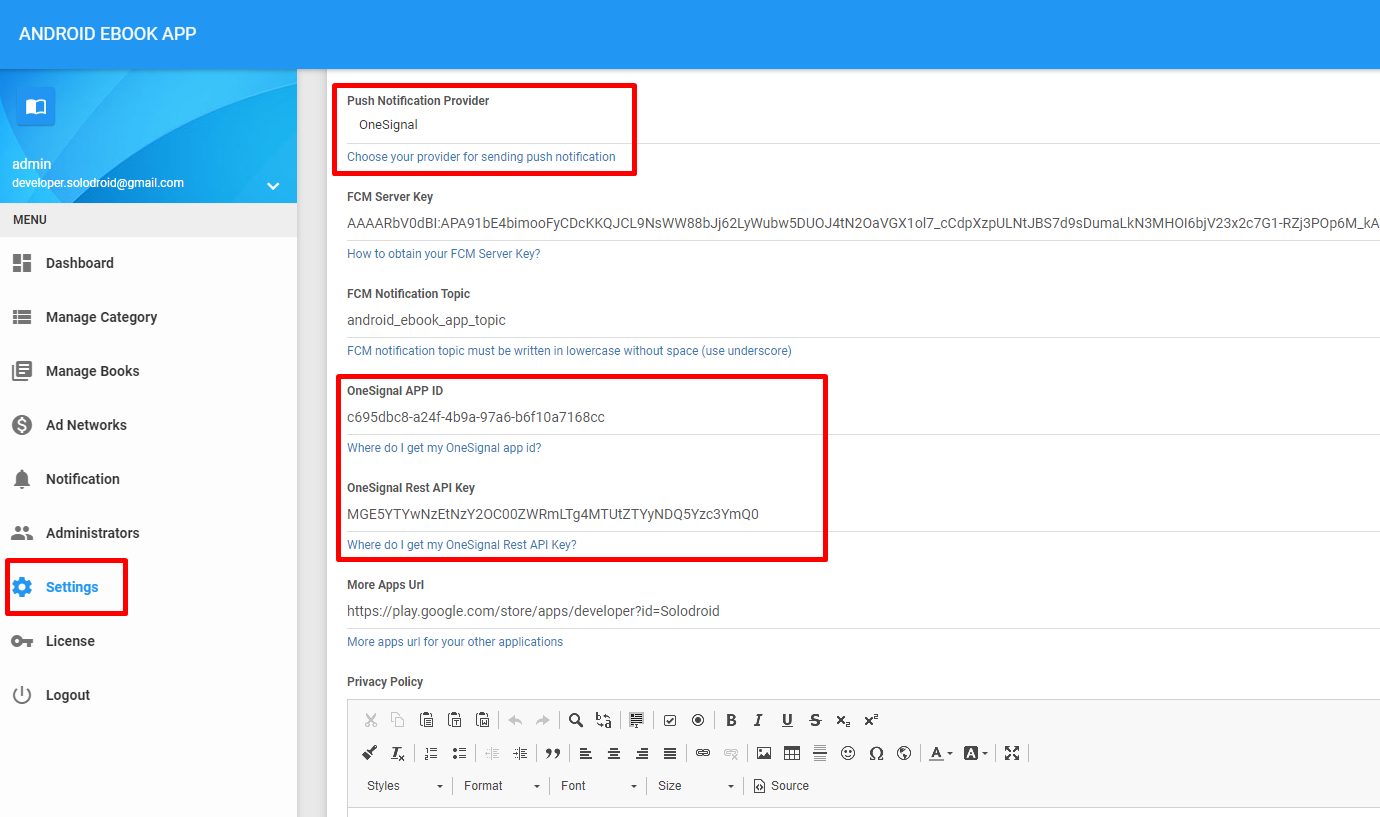
Login to your Admin Panel, navigate to Settings menu and put your OneSignal APP ID and OneSignal REST API KEY.
Package Name
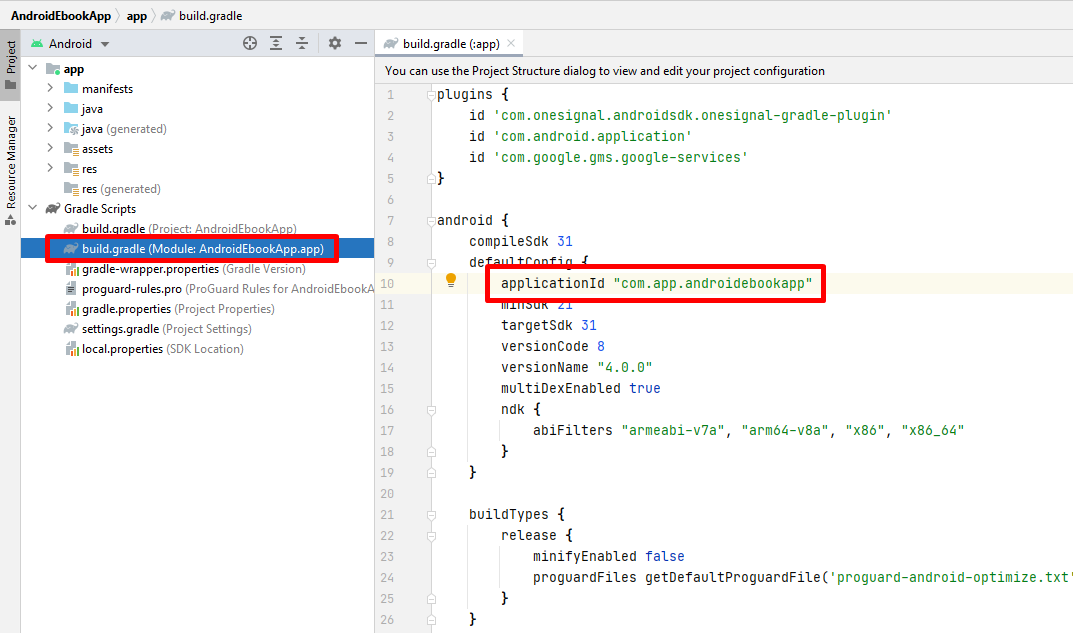
Step 1
Open Gradle Scripts → build.gradle (Module: app)
Change the application ID with your own id name
Standard naming procedure : com.yourdomainname.yourappname
Click Sync Now.
Change the id as unique as possible, because application id is very important used if you want to publish the application to the google play.
Important : your applicationId or package name must same with your package name that you’ve create on firebase console when you generate google-services.json
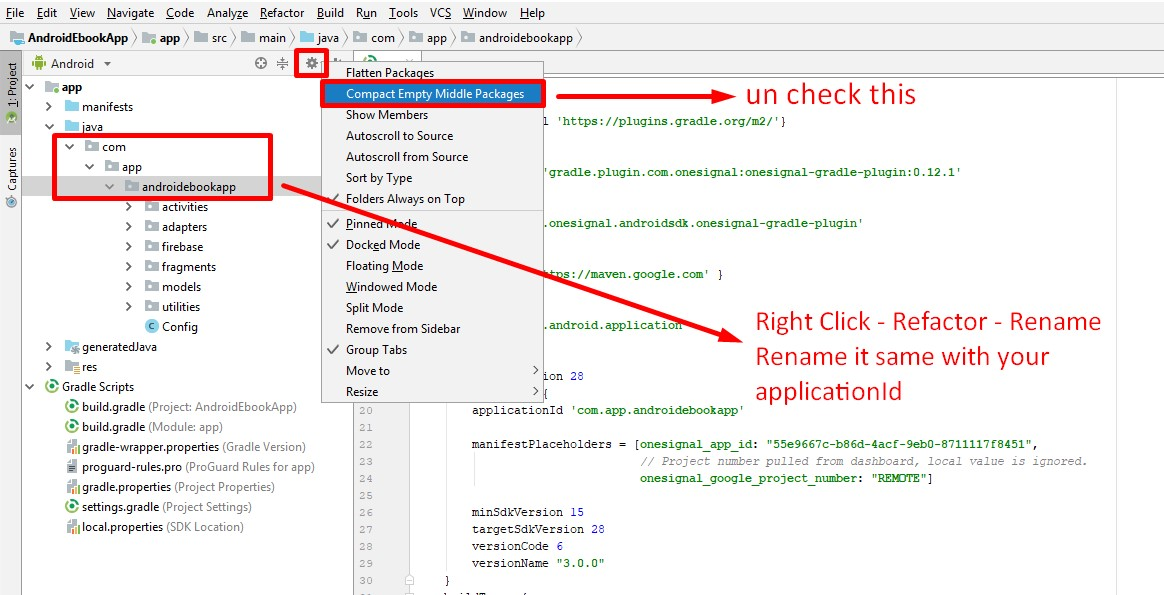
Setap 2:
2.Close / Unselect Compact Empty Middle Packages
3.Right click your package and rename it.
Setap: 3
<meta-data
android:name="com.onesignal.NotificationServiceExtension"
android:value="<your_package_name>.notification.NotificationServiceExtension" />
Server Connection
//your Server Key obtained from the admin panel
public static final String SERVER_KEY = "XXXXXXXXXXXXXXXXXXXXXXXXXXXXX";
//your Rest API Key obtained from the admin panel
public static final String REST_API_KEY = "xxxxxxxxxxxxxxxxxxx";

Ad Network
Google AdMob
StartApp (Start.io)
Unity Ads
AppLovin's MAX
Mopub
Audience Network (Bidding Only) with AdMob, AppLovin's MAX or Mopub as Mediation Partner
Especially for Audience Network, Audience Network will only use bidding for Android apps starting September 30, 2021. So, you need to setup for Bidding with Partner Mediation. If you choose to use Audience Network Bidding, please select Ad Network Type to be AdMob, AppLovin or Mopub, These Ad Networks support being a Mediation Partner although it's still a Beta version.
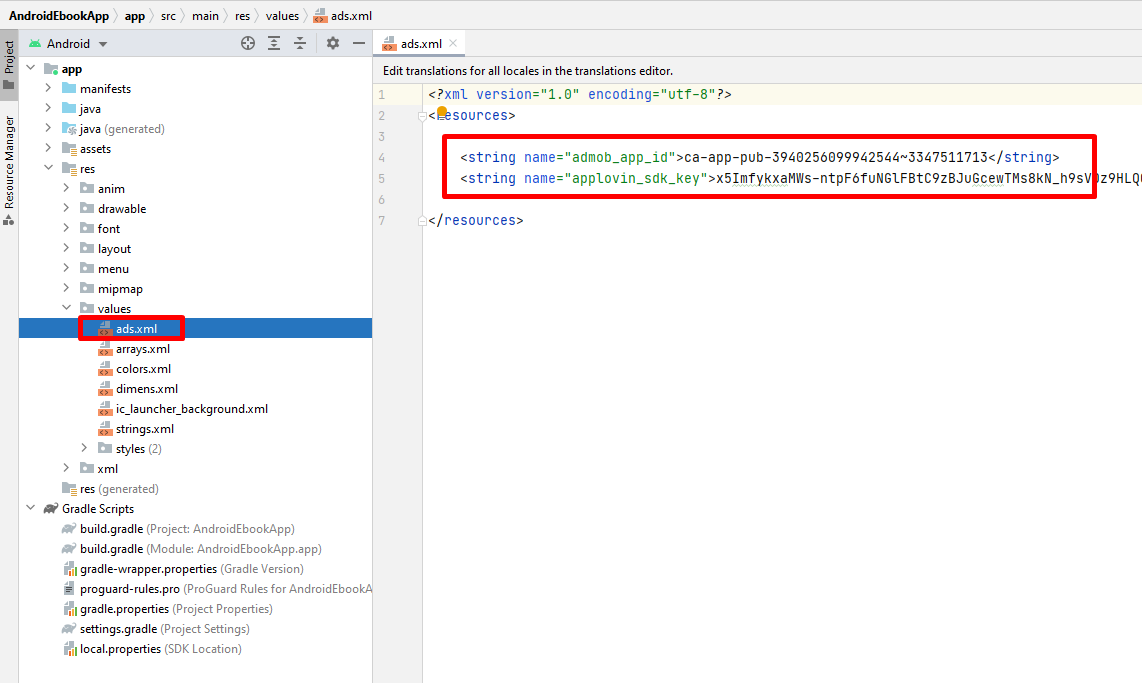
IMPORTANT : All ad network id units are placed in admin panel except AdMob App ID and AppLovin SDK Key, both ids must be integrated programmatically in android code inside res/value/ads.xml
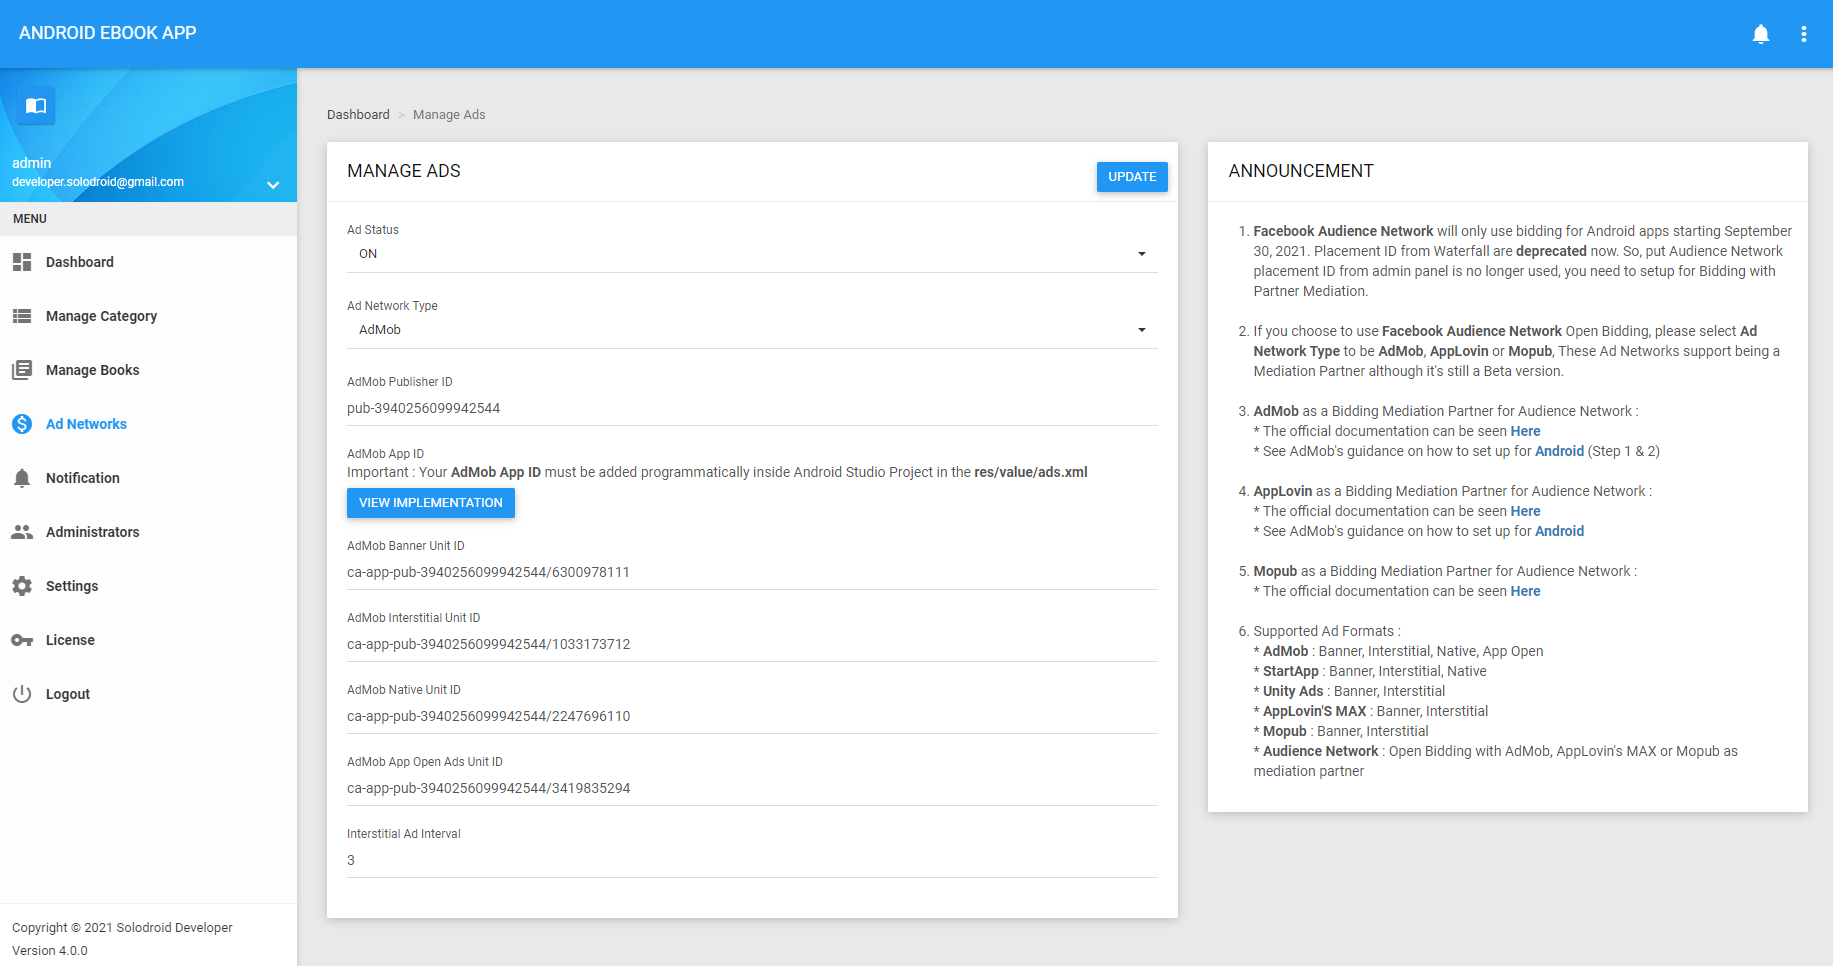
Remote Ad Networks from the Admin Panel :
You can switch to use Ad Network according your needs
You deactivate a particular ad format in the available form by giving 0 value
Change Logo
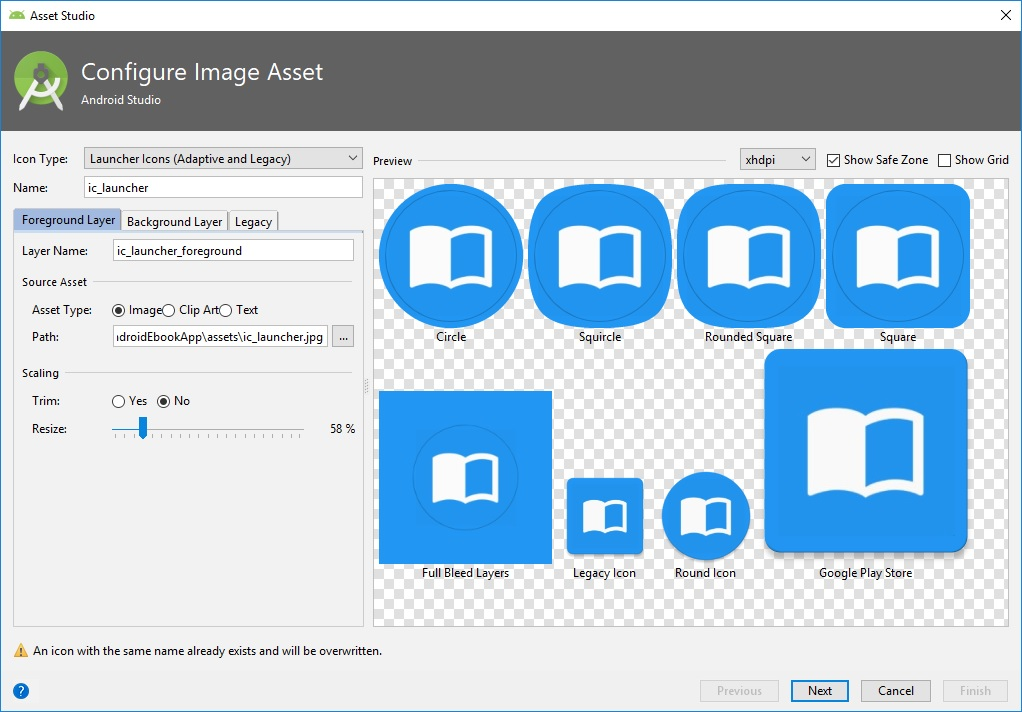
Open Android Studio → File → New → Image Asset
You can choose 2 types of your icon type, that is Launcher Icon (Adaptive and Legacy) or (Legacy Only)
Recommended to use Launcher Icon (Adaptive and Legacy)
Browse and choose your image file icon (.png) format with square dimension and start customize your icon
Make sure the resource name is “ic_launcher” → Next → Finish
Change Color
1.to change the app color, you can see on the res/values/colors.xml
2.Enter your color code inside each of strings tag :
<!--app main color-->
<color name="colorPrimary">#2196F3</color>
<color name="colorPrimaryDark">#1D81D1</color>
<color name="colorAccent">#52c9ff</color>
<color name="colorBackgroundLight">#FFFFFF</color>
<!--dark theme color-->
<color name="colorStatusBarDark">#0F1D24</color>
<color name="colorToolbarDark">#222D36</color>
<color name="colorBackgroundDark">#101D24</color>
Change Text
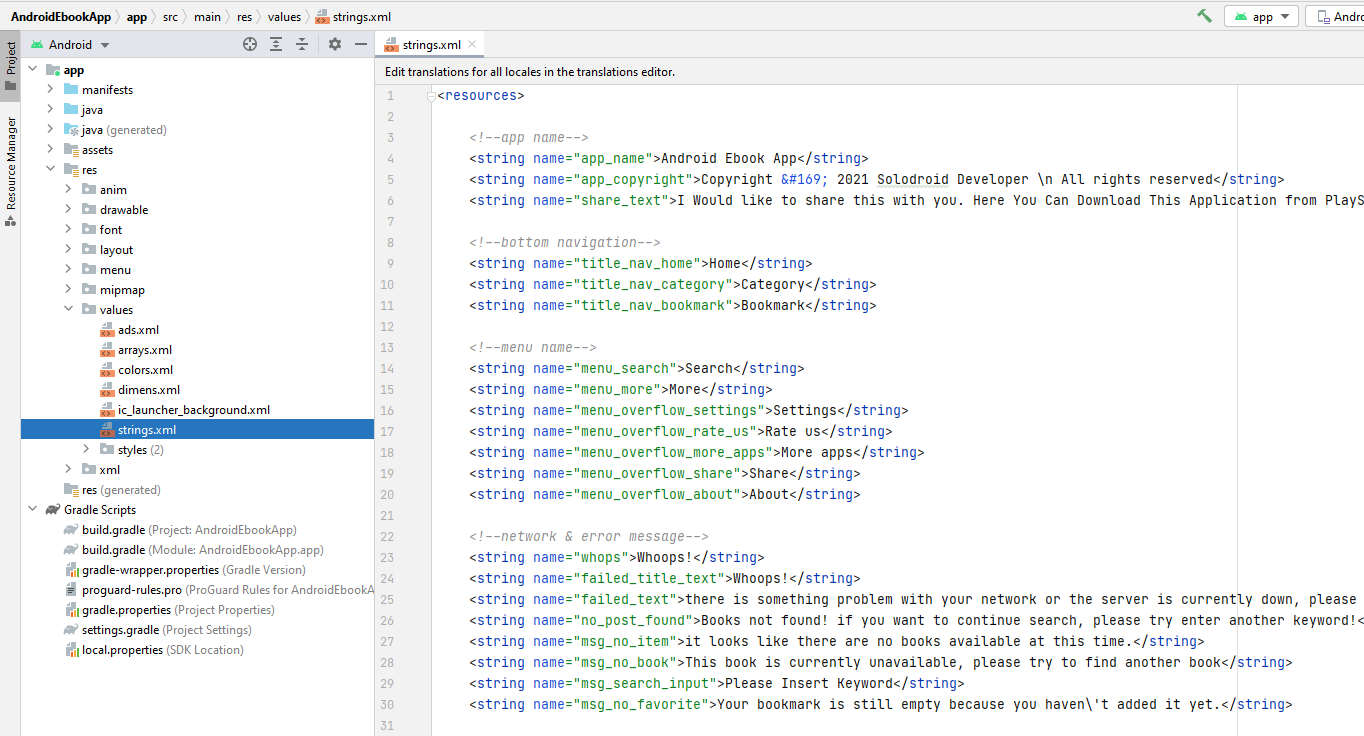
The text asset consists of the application name of another text component inside the app, to change it :
1.You can see on the res/values/strings.xml
2.Change value name in each strings tag according your needs.
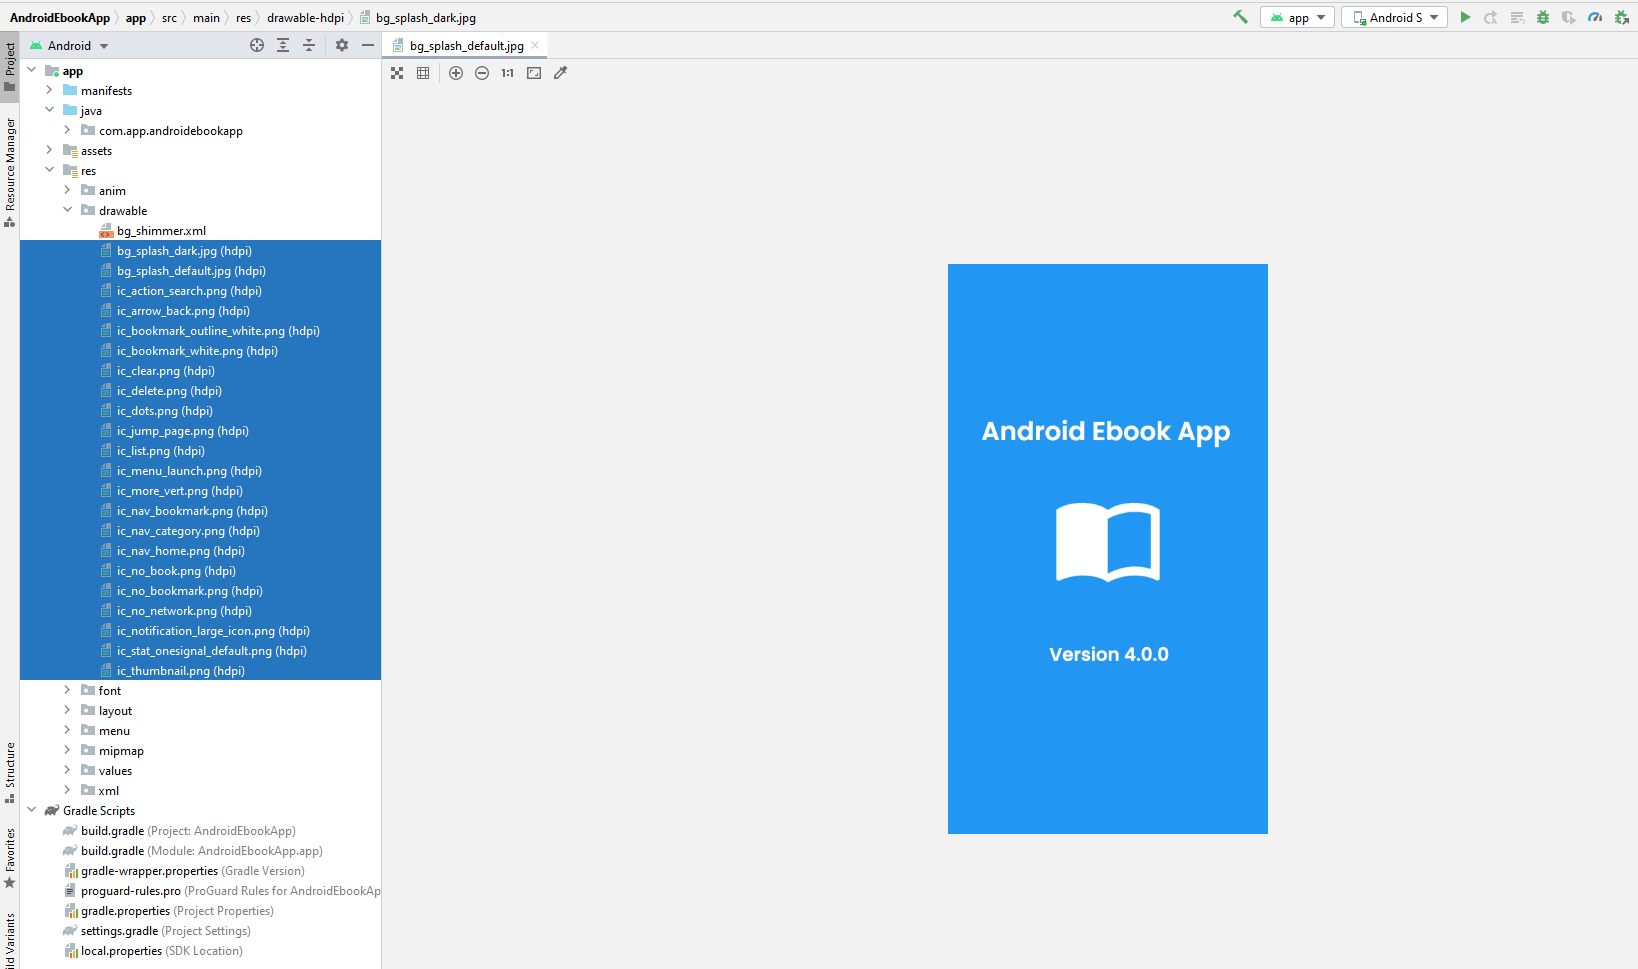
Change Images
The image asset consists of the splash image and other image component inside the app, to change it :
1.Open res/values/drawable and replace with your image or icon, all image are placed on drawable-hdpi folder
2.you also can change every image in app like via Explorer, open Explore and go to your project directory, select AndroidEbookApp/app/src/main/res/drawable-hdpi
3.Replace every image which you need to custom the application and highly recommended you using same resolution for each image
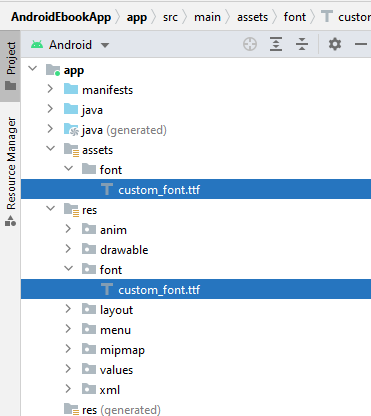
Change Font
If you want to change the app font, you can change the app font with your custom font with .ttf extension, rename your font file to custom_font.ttf, then, copy and replace the existing font to :
1.res/font/custom_font.ttf
2.assets/font/custom_font.ttf
Admin Panel
Getting Started
Before doing installation, you need to do the following things :
Have a web hosting to store admin panel files and MySQL Database to run this admin panel, web hosting that you use must have the following requirements :
PHP Version 5.4, 5.5, 5.6 or 7.2
Support MySQLi and PDO
Apache Server
Shared hosting with Cpanel (We didn't check the script’s performance on the VPS and VDS hosting)
Because this documentation using cpanel, a web hosting with cpanel is recommended. If you don’t have web hosting or domain, you can check on this sample site which provide hosting and domain service :
Free web hosting & domain services :
000webhost
Premium web hosting & domain services (Highly Recommend) :
Hawkhost
Hostgator
Domainesia (Indonesian Hosting)

Database Configuration
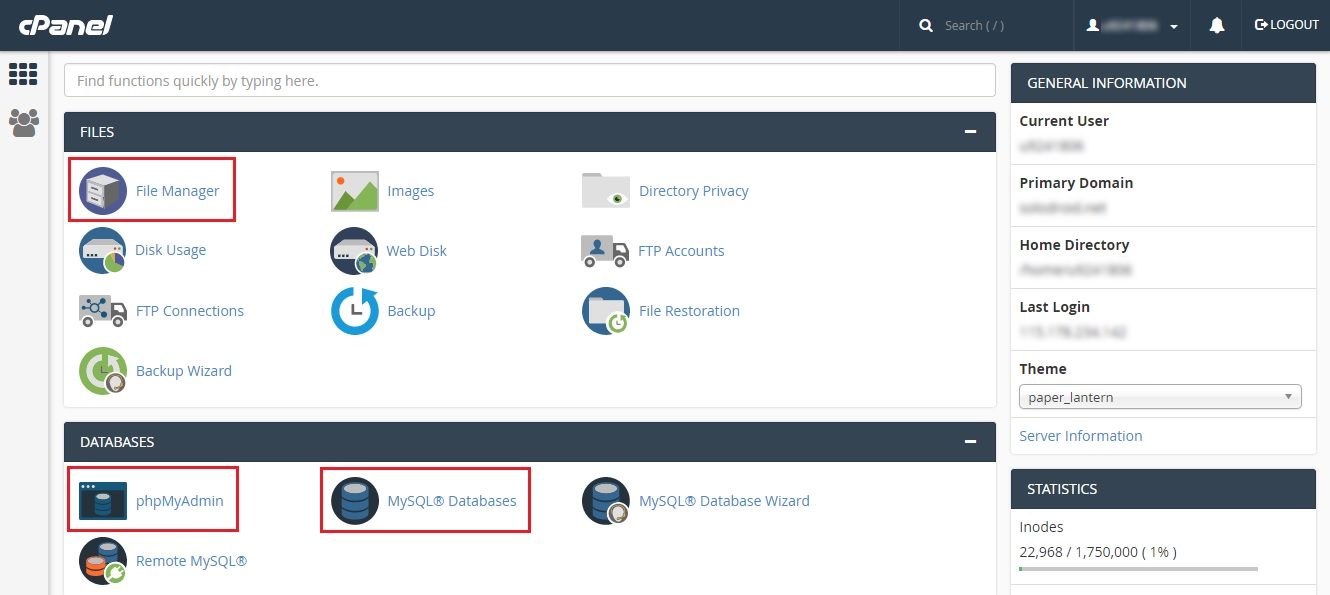
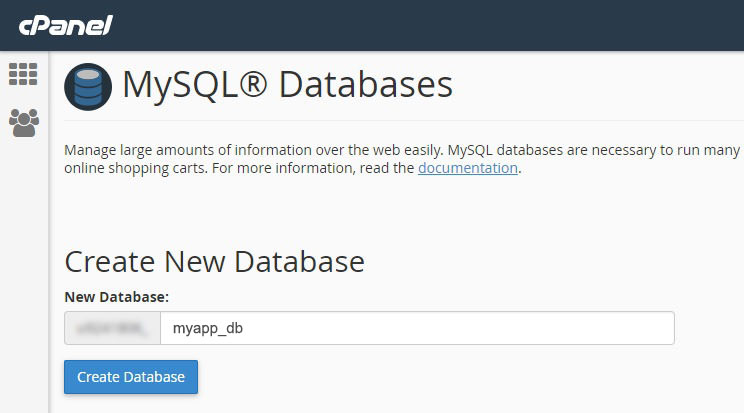
Create Database
Login to your cpanel hosting and open MySQL Databases
Create database and give database name like you want, as example : ‘solodroid_myapp_db’
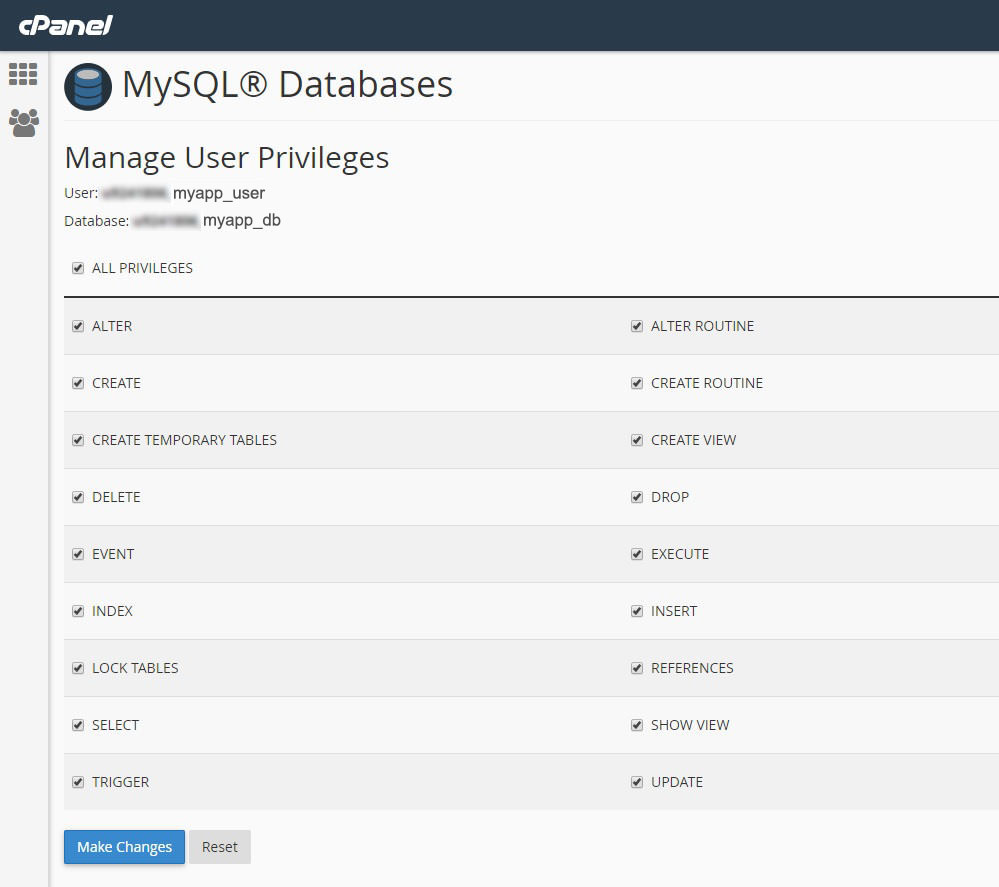
Create user for your database
Add user to your database and check ALL PRIVILEGES

Import Database
Open phpMyAdmin and select your database
Import database file “ android_ebook_app_db.sql” from download package inside ‘admin_panel‘ folder
Upload PHP Scripts
Open File Manager via cpanel or ftp server
Upload “android_ebook_app.zip” inside “admin_panel” folder to your folder destination on your hosting, then extract it
Database Connection
to change configuration please see includes/config.php file
//database configuration
$host = "localhost";
$user = "root";
$pass = "";
$database = "android_ebook_app_db";
$connect = new mysqli($host, $user, $pass, $database);
if (!$connect) {
die ("connection failed: " . mysqli_connect_error());
} else {
$connect->set_charset('utf8mb4');
}
Default Admin Panel Login detail
Username : admin
Password : admin

0 Comments
Post a Comment